My sister, Janine at www.happyhappynester.com inspired this story. We collaborate on projects for her blog, and she tells me that her friends ask what photo tools you use for this or that shot. This post will share some of the items I use for her blog photography. These are all excellent tools for the photoblogger.
So here’s a list of seven tools that I use when photographing.
A list from 1. Lenses, 2. Tripod Articulating Arms, Ball Heads, 3. Camera Tethering to a Computer, 4. Surfaces, 5. Fill Cards, Mirror, Auxillary Flash or Floodlight, 6. A Level 7. Color Checker. Let’s get started.
If you are to consider adding lenses to your camera system, you have many choices.
Some prefer a zoom lens’s convenience (a lens with a range of focal lengths all in one). A zoom lens also cuts down on lens changes that will limit dust on the sensor. With that said, I prefer fixed focal length lenses. Why? I like fast lenses as an option. For instance, I have a 50mm f/1.4 or an 85mm f/1.2. When shot wide open (f/1.4 or f/1.2), these lenses provide a blurry foreground or background (bokeh) that creates a pleasing effect.

That look is dreamy if that is an attractive attribute to your style of photography.
I also have a Tilt-Shift lens in my bag. This lens takes a little know-how on how to use but provides a look that no other lens. You can configure the plane of focus based on the importance of the subject. It also allows you to raise or lower the camera’s perspective.
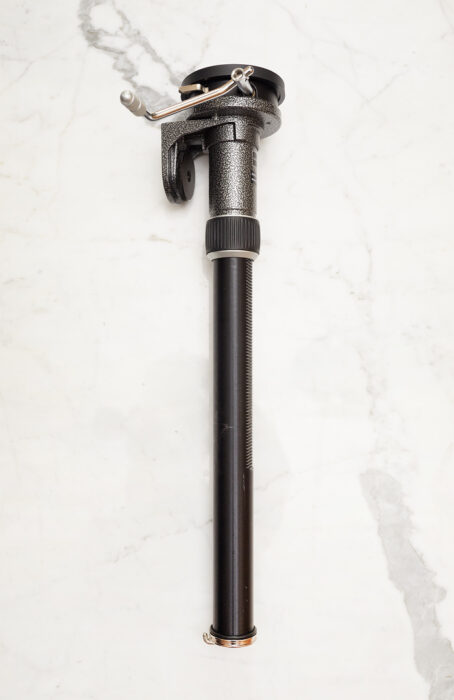
Another tool I like to use is a tripod with a ball head. Another excellent tool for the photoblogger.
A tripod allows you to steady the camera and lock down your composition or viewfinder frame. Sometimes you can get by without one, but working on a still-life image where you are adding to the set the tripod will save you time and headaches. Some tripods also have a built-in articulating arm (for flat lay photography.) These are all excellent tools for the photoblogger.
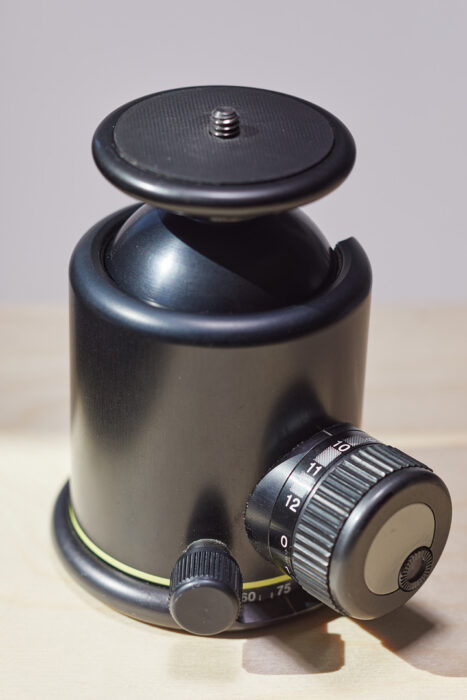
For other tripods, you need to purchase an articulating arm accessory. When shooting a flat lay with an articulating type arm, you should always use a counter-balance (sandbag or clip-on counterweight to the column of the tripod, so it doesn’t tip over.)
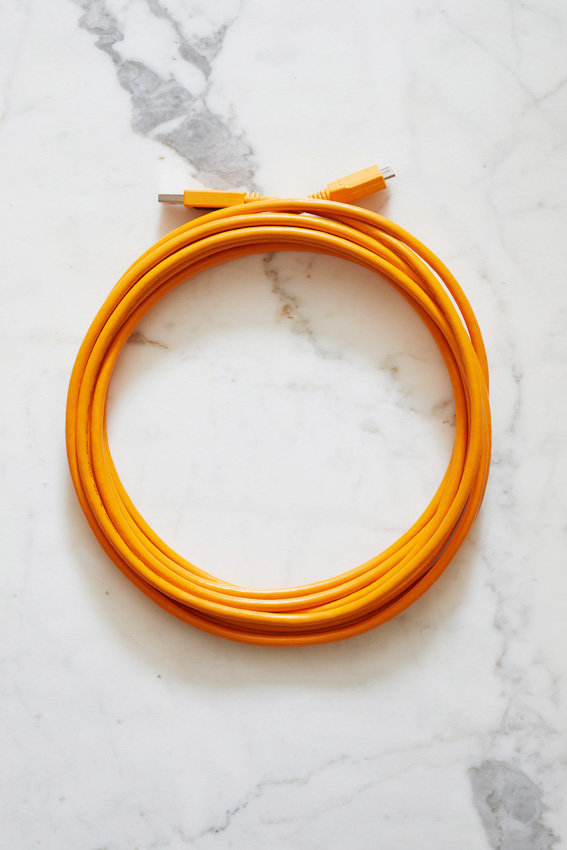
I like to tether my camera to my computer’s imaging software. These are all excellent tools for the photoblogger.
Not all cameras allow this, so you can find out if your software is compatible with your camera. If so, you will need a compatible USB-type cable that connects your camera to your computer. TetherTools has a good selection of cables that allow tethering.
Surfaces, surfaces, surfaces.
Select a substrate to fit the mood. If you are doing a flat lay, you may elect to set it up on the floor. If you are photographing a product, you may want a table. Choose what surface you wish to use and make sure it’s secure. Marble, wood, plastic, tile, tabletops, cloths, and glass are just a few surfaces.
Fill-cards and mirrors, and lights too. More excellent tools for the photoblogger.
Sometimes the light needs adjustment in places, so if you have a reflector, you can bounce light into an area you want to brighten. If you don’t have an external flash, a fill-card can be handy. Using foam core, gatorboard, and mirror work to fill light in dark spots. Even prop up a white sheet will work.
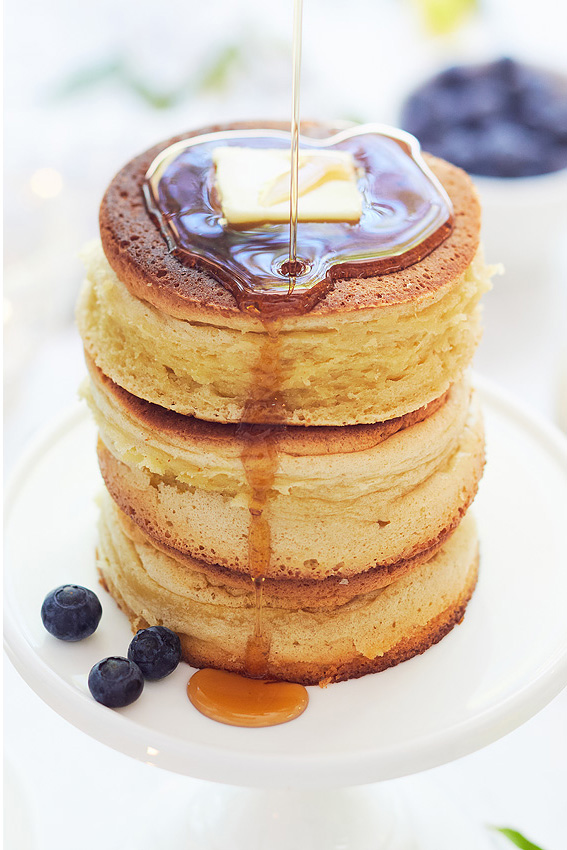
Photography with artificial light. Use flash or floodlights if good daylight is not an option. If you don’t have access to a sunny or lite spot, you may opt for either. Floodlights usually have a different color balance to daylight, so to be used at night or in a dark room. Flash is a subject all in itself. On a cloudy day I will use flash to simulate daylight. I use Profoto flash, and there are many good brands out there. I would first try to light using daylight whenever possible and flash when the right light is not available. On occasion, instead of using a fill-card, I will use flash for fill light. The photo below is available light with a flash to the upper-right of the set.

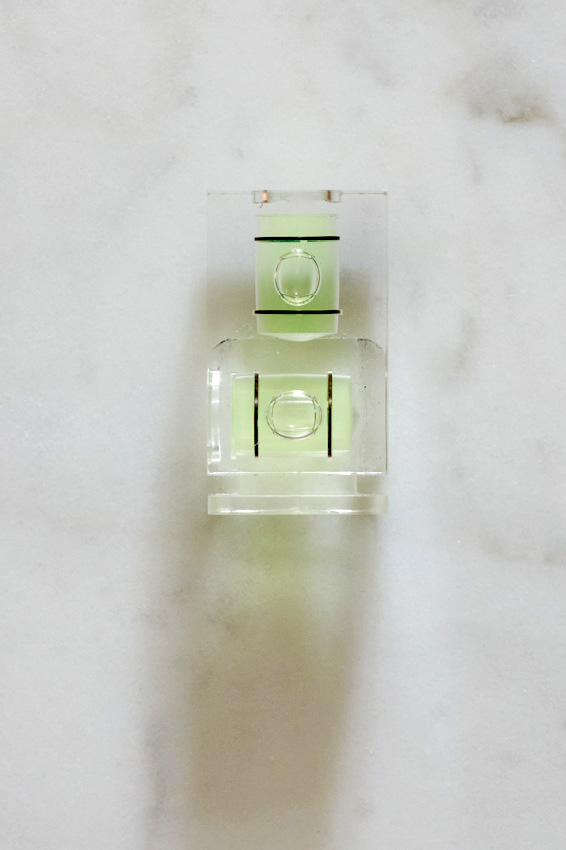
A level comes in handy when photographing a flat lay.
Use a hot-shoe camera level to ensure your camera is level. A camera remote also is good. I place the camera on a two-second delay to avoid any camera movement.
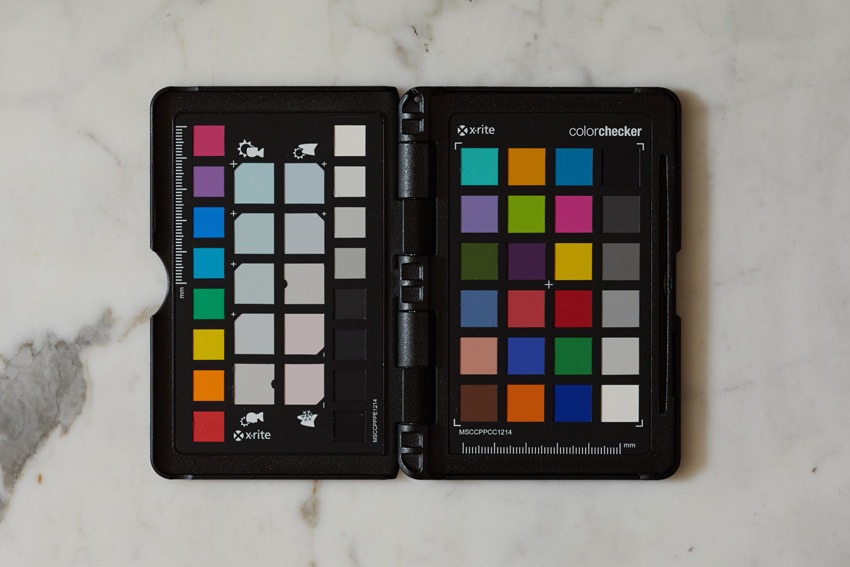
A Color Passport or Color Checker.
You would place this in a test shot before starting to allow you to set a White Color Balance. Sometimes the color can skew without you noticing it. The Color Passport will allow you to establish the color balance for your photoshoot. Simple place in the photo set. Select the White Balance tool in the software and click the Neutral Gray to set your color balance. If you want to edit the color balance from neutral, you can do so, and so long as the light doesn’t change, the color will be stable.
Hopefully, some of these tools will help you with photography for your blog or any other photos you decide to make. These are all excellent tools for the photoblogger. Thanks for reading, and be inspired by your photography!