Landscape photography tips. I’ll begin by talking about what happens during a hike out on the trail. Secondly, Collecting thoughts and looking for subjects. Finally, I will finish by importing them into the computer and adding software enhancements before posting them onto social media.
I want to start the article on Friday’s hike in the evening.
After a day of shooting food for my sister’s blog, my sister, her daughter, and I went for a walk.
The weather was pleasant, and the light was low and not quite over the hill. On the way back, which was just about when the sun was setting, I saw a possible image. I wear glasses and usually have a leash on them, but didn’t this time. As I was walking up a hill to get a better host, I tucked my glasses under my right arm. I took a picture and figured I needed to hike some more up the hill. Little did I know that my glasses had fallen while going uphill. It wasn’t till I finished taking one more photo that I realized my glasses were not under my arm!
Use a leash for your glasses!
A long story short. I would have to stay overnight and try to find the glasses the next morning. So, Saturday morning rolls in, and my sister and I head out to the area that I thought I’d lost my glasses. Within five minutes, she found them! I was lucky. B&W landscape photography tips will begin. So tip #1, if you wear glasses, make sure you have a leash or place them in the camera bag or pants pocket.
Look for subjects that catch your eye.
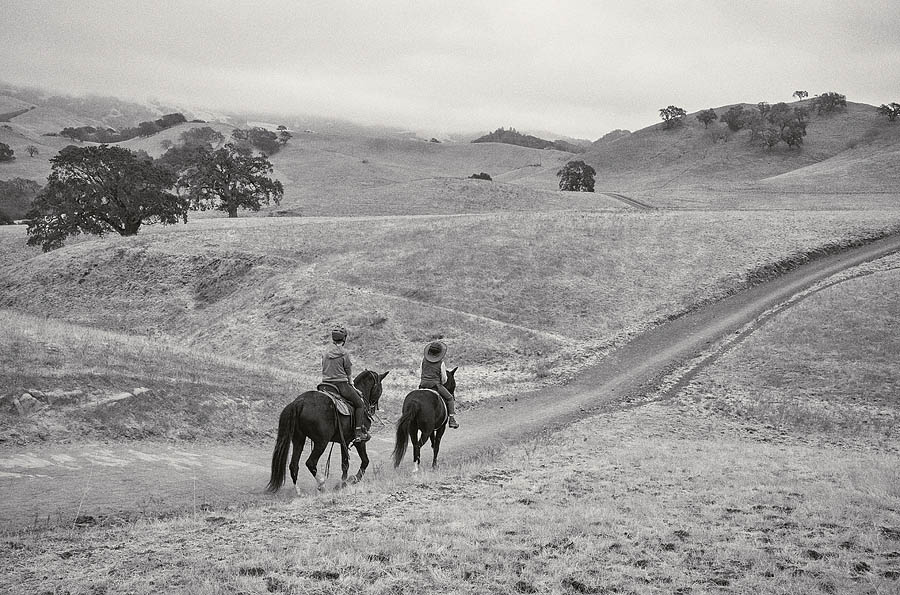
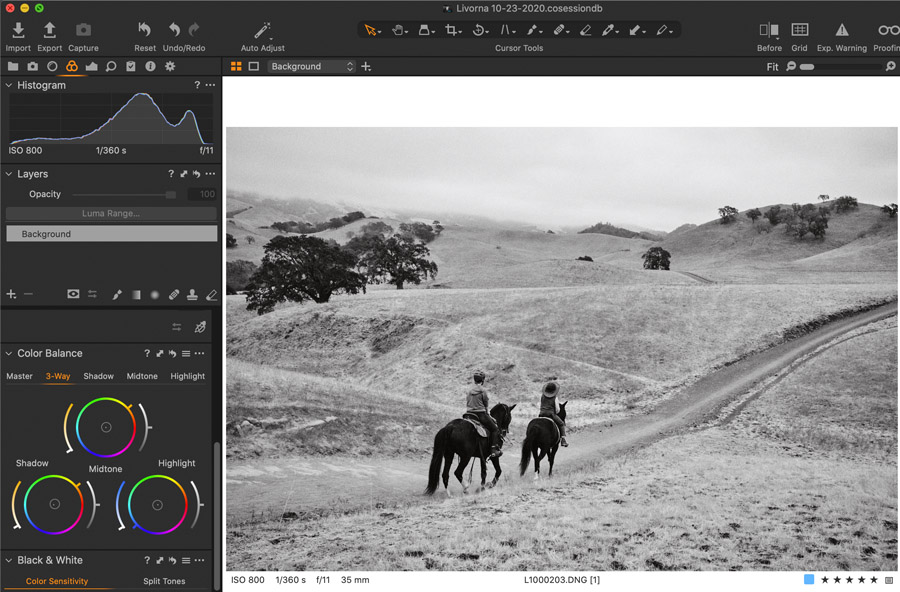
Tip #2: Be on the lookout for subjects. B&W landscape photography tips include considering what to photograph. After finding my glasses, we walked for about an hour. This week several horseback riders and bicyclists were on the trial. As a pair of riders approached, I lined up a photo and shot a couple of images. I have to consider a 1/360th shutter speed to stop the horseback riders. One of the two was going to be worthy. I used my Leica M10 Monochrom with a 35mm lens. That means I need to move to frame the image correctly.
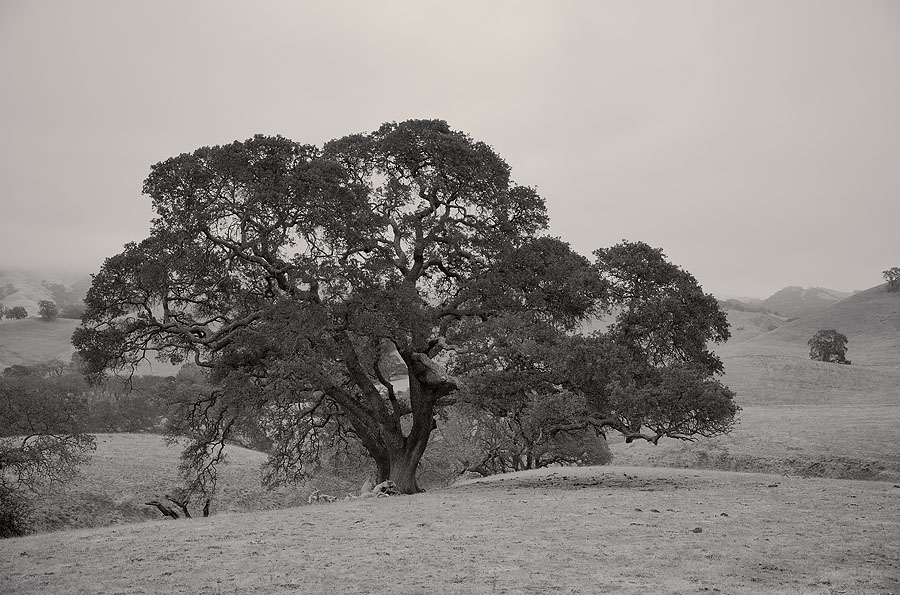
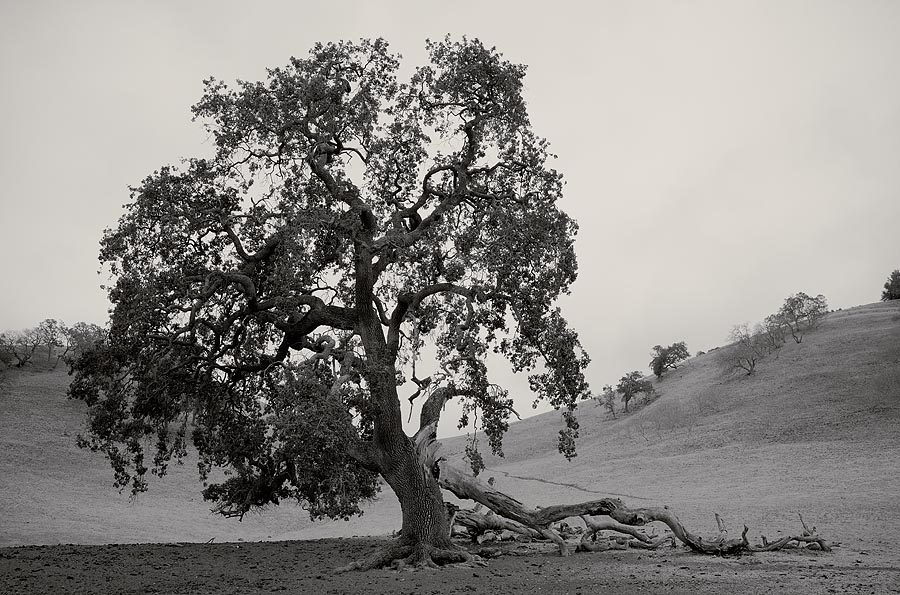
Later, along the trail, I found another image of Mt. Diablo in the background. More of a pastoral image as the tree sat among the hilly fogged mountain. Again, I found a couple more photos.
Importing images and processing them.
Tip #3: Shoot Raw images. Finally, I like to shoot Raw images because they hold the most information and the most flexible file to edit. I process them in Capture One Pro 20 software. First, I create a new session with Capture One Pro 20 on my external SSD hard drive. Then I insert the cameras SD card on my laptop, and copy the image files to the SDD Session sub-folder named capture. Then, I open the session in Capture One Pro 20 and open the session and click the capture folder, and the files will appear in the image browser.
I like to use mostly Curves and Levels. If I use High Dynamic Range sliders, I use them sparing and watch out for halos or glowing edges in the image. I will then move to grain to get a film-like look. I’ll finish up by added some tint with the 3-way color editor. The color editor allows you to tweak Highlights, Midtones, and Shadows to your liking. The tool’s breakdown is the saturation slider 0%-100% on the left, the tone slider in the center, and the brightness slider on the right. Each part of the tool has a tab that allows you to slide in the effect when you grab it. If you are toning a color image, desaturate before using the 3-way color editor.
Lately, I used warm tones for the Highlight and Shadow and cool tones for the Midtone. The combination seems to create a pleasing palette to my eye. Well, I hope these B&W landscape photography tips are helpful. Be patient and try to make some new images. Enjoy photographing!